USD
USD  Canadian Dollar (CAD $)

Stainless steel is widely used across industries thanks to its durability, corrosion resistance, and clean, modern appearance. Over time, however, even stainless steel can lose its shine, developing scratches, haze, or dullness from regular use.
Buffing is one of the most effective ways to restore stainless steel to a smooth, mirror-like finish. With the right tools, compounds, and technique, you can significantly improve both the appearance and longevity of your surface.
In this guide, we walk through the step-by-step process of buffing stainless steel using airway buffs, along with best practices to achieve a professional finish.
Materials and Tools
Before getting started, gather the following:
- Safety gear (safety glasses, dust mask)
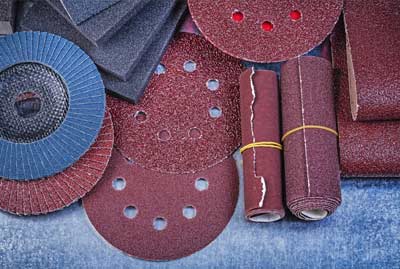
- Sanding materials (various grits)
- Airway buffs (different stiffness levels)
- Buffing compounds (cut and finish compounds for stainless steel)
- Variable-speed buffer or polisher
- Clean, lint-free cloths
- Masking tape (to protect surrounding areas)
Step-by-Step Process
Step 1: Safety First
Always wear proper protective equipment. Buffing can generate dust and compound residue, so safety glasses and a dust mask are essential.
Step 2: Prepare the Work Area
Mask off any surrounding areas you want to protect. Work in a well-ventilated space, as buffing can create airborne particles and splatter.
Step 3: Surface Preparation (Sanding)
If the surface has scratches or heavy imperfections, begin with sanding.
- The grit you start with will depend on how deep the scratches are
- Start with a coarser grit and gradually move to finer grits
- Work up to approximately 400-600 grit for best results before buffing
Proper prep is critical. The better the surface preparation, the better the final finish.
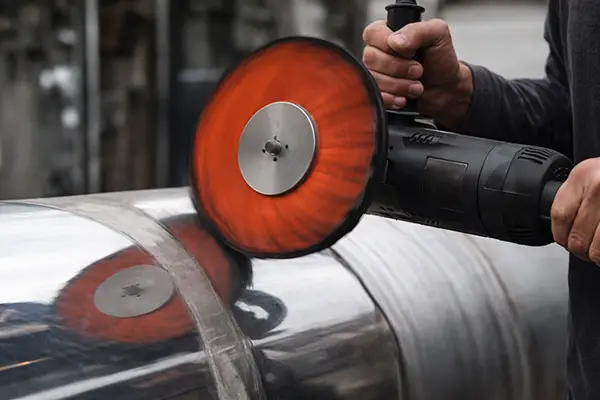
Step 4: Select the Right Airway Buff
Airway buffs are ideal for stainless steel and come in different stiffness levels:
- Stiffer buffs: For cutting and removing scratches
- Softer buffs: For final polishing and achieving a high shine
Choose based on the level of correction and finish you’re aiming for.
Step 5: Apply Buffing Compound
Apply a stainless steel buffing compound directly to the airway buff.
- Start with a cut compound if scratches are present
- Progress to finer finishing compounds for a mirror finish
Use small amounts and distribute evenly across the buffing wheel.
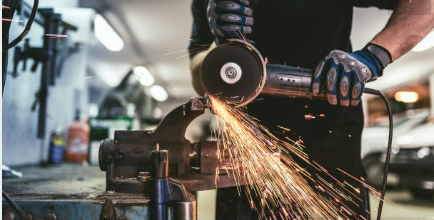
Step 6: Begin Buffing
Work the buffer evenly across the surface:
- Use consistent, moderate pressure
- Keep the tool moving at all times
- Cut area is just the edge of the buff, so use tight, even passes
- After you finish the area you are working on, change direction to run perpendicular to your previous passes.
Focus on problem areas, but avoid staying in one spot too long to prevent heat buildup.
Step 7: Clean and Inspect
Regularly stop to wipe the surface with a clean cloth.
- Remove excess compound
- Check your progress under good lighting
Repeat the process as needed until the desired finish is achieved.
Step 8: Final Inspection and Touch-Ups
Inspect the finished surface from multiple angles.
- Look for remaining haze or swirl marks
- Perform light finishing passes if needed
A consistent, mirror-like finish should appear uniform across the entire surface.
Best Practices for Better Results
- Always start with proper surface preparation
- Use the correct compound sequence (cut → polish)
- Avoid excessive pressure or speed
- Keep buffs clean and in good condition
- Work in controlled, well-lit conditions
Frequently Asked Questions (FAQs)
How do you get a mirror finish on stainless steel?
Achieving a mirror finish requires proper sanding, followed by progressive buffing with the right compounds and buffing wheels.
What grit should I sand stainless steel before buffing?
Typically, sanding up to 400-600 grit provides a suitable base for buffing. It is common to use 5” velcro discs on an orbital sander or speed sander.
What buffing compound should I use for stainless steel?
There are options here. You can do a 2 stage cut-colour, however more common is a 3 stage cut-cut/colour-colour with corresponding buffs.
What speed should I use when buffing stainless steel?
A good starting point is around 3,000–3,500 RPM. Higher speeds can be used carefully, but excessive speed may cause overheating or damage.
Can you buff out scratches in stainless steel?
Yes, most surface scratches can be removed through proper sanding and buffing. Deeper scratches may require more aggressive prep work before polishing.
Why does stainless steel turn blue when buffing?
Blue or discoloration marks are caused by heat buildup. This typically happens when too much pressure is applied or the buffer is held in one spot for too long.
How do I avoid swirl marks when polishing?
Use lighter pressure during final passes, switch to a softer buff, and ensure you’re using a finishing compound. Changing directions between passes also helps.
Conclusion: Restore the Shine with the Right Process
Buffing stainless steel is a detailed process, but the results are worth the effort. With the right approach, you can transform dull, scratched surfaces into clean, high-shine finishes that look like new.
Whether you’re working on industrial components, automotive parts, or decorative finishes, proper technique and quality materials make all the difference.
Get the Right Tools for the Job
At Sandpaper.ca, we offer a full range of sanding products, airway buffs, and polishing compounds designed to help you achieve professional results.
Browse our selection or connect with our team to find the right solution for your stainless steel finishing needs.
Sandpaper.ca – Precision Finishing Starts Here.